Are you looking for a way to make barista-worthy coffee drinks right in the comfort of your own home? Look no further than the Nespresso milk frother! This innovative device makes it easy to create delicious cappuccinos, lattes, and other espresso-based drinks. In this blog post, we’ll provide detailed instructions on how to use Nespresso milk frother for the best possible results. We’ll also discuss what you can expect from using a Nespresso milk frother in 2023. So get ready to learn all about using Nespresso milk frother for barista-worthy results!
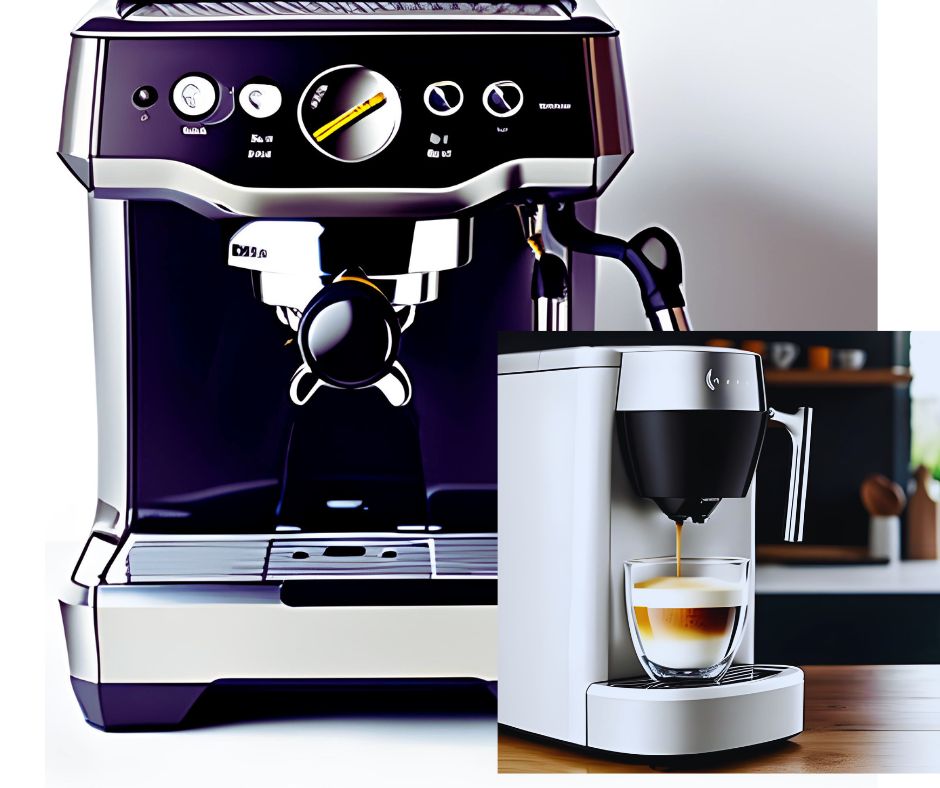
The Nespresso Milk Frother: An Overview
The Nespresso milk frother is a compact and convenient device that allows you to create rich and creamy milk foam for your coffee drinks. Designed with simplicity in mind, this frother is a perfect addition to any coffee lover’s kitchen.
One of the standout features of the Nespresso milk frother is its ability to heat and froth milk simultaneously. This means that you can enjoy hot and frothy milk for your cappuccinos or lattes in just a matter of minutes. The frother has different settings to control the temperature and foam density, allowing you to customize your drink exactly to your liking.
The Nespresso milk frother is compatible with various types of milk, including dairy and non-dairy options. Whether you prefer whole milk, almond milk, or soy milk, you can achieve the perfect froth every time. The frother’s whisking mechanism ensures that the milk is evenly frothed, resulting in a smooth and velvety texture.
With its sleek and stylish design, the Nespresso milk frother will not only elevate your coffee experience but also add a touch of elegance to your kitchen countertop. Its compact size makes it easy to store, and the removable parts are dishwasher safe for hassle-free cleaning.
Overall, the Nespresso milk frother is a game-changer for coffee enthusiasts who crave barista-worthy results in the comfort of their own home. Whether you’re a novice or a seasoned coffee connoisseur, this device is sure to impress with its simplicity, versatility, and ability to create the perfect milk foam for your favorite coffee drinks.
Types of Milk for Frothing
When it comes to frothing milk with your Nespresso milk frother, the type of milk you use can greatly impact the taste and texture of your coffee drinks. Here, we’ll explore some of the best types of milk for frothing and provide insight into their unique characteristics.
1. Whole Milk: Whole milk is a popular choice for frothing because of its higher fat content, which results in a rich and creamy foam. The fats in whole milk also help stabilize the foam, allowing it to hold its shape for a longer period.
2. 2% or 1% Milk: If you prefer a slightly lighter foam, you can opt for 2% or 1% milk. These lower-fat options still produce a good amount of foam, but with a slightly thinner consistency compared to whole milk.
3. Skim Milk: Skim milk, which has had most of its fat removed, can also be used for frothing. However, it produces a foam that is less creamy and more airy in texture.
4. Non-Dairy Milk: For those who are lactose intolerant or prefer a dairy-free alternative, non-dairy milks such as almond, soy, or oat milk can be frothed as well. However, it’s important to note that non-dairy milks may require different frothing techniques due to their unique properties.
Experimenting with different types of milk can be a fun way to personalize your coffee experience and discover your favorite frothing method. So, grab your Nespresso milk frother and start frothing with your milk of choice for delicious and barista-worthy results!
Preparing Your Milk and Frother
Before you start frothing your milk with the Nespresso milk frother, there are a few important steps to take to ensure the best possible results. Here’s how to prepare your milk and frother for the perfect froth:
1. Choose the Right Milk: As mentioned earlier, the type of milk you use can greatly affect the texture and taste of your coffee drinks. Decide which milk you prefer and make sure it’s cold before starting the frothing process.
2. Fill the Frother: Remove the lid from the Nespresso milk frother and pour your desired amount of milk into the frother. It’s important not to exceed the maximum fill line indicated on the inside of the frother to avoid any overflow during the frothing process.
3. Attach the Whisk: Place the whisk securely onto the frother’s magnet, making sure it’s properly aligned. This will ensure that the whisk is able to rotate and froth the milk evenly.
4. Replace the Lid: Once the milk and whisk are in place, securely attach the lid back onto the frother. Make sure it’s properly sealed to prevent any leaks during the frothing process.
Now that your milk and frother are prepared, you’re ready to start frothing and create barista-worthy results with your Nespresso milk frother. In the next section, we’ll dive into different frothing techniques and tips to help you achieve the perfect milk foam every time.
Frothing Techniques and Tips
Now that you have prepared your milk and frother, it’s time to explore different frothing techniques and tips to ensure you achieve the perfect milk foam every time with your Nespresso milk frother.
1. Start with Cold Milk: For the best frothing results, always start with cold milk. Cold milk creates a better foam structure and allows for a smoother frothing process.
2. Frothing Time: The duration of frothing can affect the texture of the foam. As a general guideline, aim for about 60 to 90 seconds of frothing time. However, it’s important to note that different milk types may require varying frothing times, so it’s best to experiment and find the ideal duration for your preferred milk.
3. Experiment with Frothing Techniques: While the Nespresso milk frother makes frothing easy, you can still experiment with different techniques to achieve the desired foam texture. For example, try positioning the frother at a slight angle or moving it in a circular motion for a different foam consistency.
4. Adjust the Frothing Setting: The Nespresso milk frother allows you to adjust the temperature and foam density settings. If you prefer a denser foam, select a higher foam density setting. Likewise, if you want a hotter drink, increase the temperature setting.
5. Practice Makes Perfect: Frothing milk with the Nespresso milk frother may take some practice to achieve your desired results. Don’t be discouraged if your first attempts aren’t perfect. Keep experimenting with different milk types, frothing times, and techniques until you find the perfect combination that suits your taste preferences.
With these frothing techniques and tips, you’ll be well on your way to creating barista-worthy results with your Nespresso milk frother. Enjoy experimenting and indulging in delicious, frothy coffee drinks right from the comfort of your own home!
Cleaning Your Milk Frother
Cleaning your Nespresso milk frother is essential for maintaining its performance and ensuring that your coffee drinks always taste their best. Here’s a step-by-step guide on how to clean your milk frother:
1. Unplug and Cool Down: Before you start cleaning, make sure your frother is unplugged and has cooled down. This is important for your safety and to prevent any damage to the frother.
2. Remove the Whisk: Carefully detach the whisk from the frother. Most Nespresso milk frothers have a removable whisk for easy cleaning. Gently pull it out and set it aside.
3. Rinse the Frother: Fill the frother with warm water and a small amount of dish soap. Swirl the soapy water around to remove any milk residue or stains. Be sure to cover the inside of the frother and pay extra attention to the bottom, where milk can sometimes accumulate.
4. Clean the Whisk: While the frother is soaking, clean the whisk separately. You can do this by rinsing it under warm water and using a soft brush or cloth to remove any milk residue. Make sure to clean each part of the whisk thoroughly.
5. Rinse and Dry: Once you’ve finished cleaning, rinse both the frother and the whisk with clean water to remove any soap residue. Then, dry them thoroughly with a clean towel or let them air dry.
6. Reassemble and Store: Once everything is dry, reattach the whisk to the frother. Make sure it is properly aligned and securely attached. Store your Nespresso milk frother in a clean and dry place, ready for your next use.
Regular cleaning of your Nespresso milk frother will help maintain its performance and ensure that you always get the best possible froth for your coffee drinks. By following these simple cleaning steps, you can enjoy barista-worthy results every time you use your frother.
Learn how you can save money for your coffee business
Youtube Official Guide